About 2 weeks ago I was feeling guilty for not having a growth
chart for the kids. That’s right I have neglected this childhood ritual for 4
years already and was feeling really badly about it. Part of the reason we hadn’t
done it was because as a military family doing it on a doorframe or wall isn’t
really a good idea. But let’s face it, you and I both know there are plenty of
growth charts out there that I could take off the wall and roll up and take
with us whenever we need to move, so honestly I don’t know why we hadn’t done
this before.
So last week, when I was drooling over curtains online (not
to buy, but I once wanted (would still love) to be an interior decorator) there
was an ad along the side for a sight called http://www.dearlillie.com/.
By the way, it’s pretty creepy how google and other computer God’s know exactly
what I like and what I “need” at exactly the right time. It was almost like
they were in the room when Tim and I said we needed a growth chart for the kids
because there it was-
A growth chart that we can move with us and its good looking
enough that it doesn’t have to be banished to the kid’s room. Two problems
though: #1 I’m not buying anything new for a year. #2 Even if I were I wouldn’t
spend $75 before shipping.
Naturally, as with almost anything I see, I was convinced I
could make one. After all the site gave me the dimensions of the board and the
idea- the hard work was over.
So I went to Lowes and bought (gasp- I know) a 1x6x8 board
for about $6. The rest of the supplies I had on hand.
First I sanded down the edges and surfaces of the board. It
was a quick, light sanding with a relatively fine grit paper.
Then I brushed on the stain, wiped off the excess and let
the board dry overnight.
As I was letting the boards dry, I googled “ruler font.”
Well when you do that the very first result is for a blog where the chick is
making this exact same thing. Man, and I thought I was being fairly original.
Turns out that Pottery Barn offered the growth charts circa 2008 and people
have been making knock-offs since, either to resale at other heinous prices or
for their own homes. Here is the site where I found the font (Century at 200pt) http://517creations.blogspot.com/2011/04/ruler-growth-chart-pottery-barn-knock.html.
And even though it hurt my ego a little to know I’m not in fact all that
crafty, I am glad I stumbled upon her page because my plan was to print out the
numbers tape them to cardboard and cut out the numbers to create a stencil.
Because I’m also insanely hardheaded, I still wanted to do this my way, so I
even started this taping and cutting process but my “stencils” were very rough
and jagged. Eventually I conceded and printed out “mirror images” of the
numbers.
The next day, while the girls were napping, I measured and
marked off the “ticks” of the ruler. Believe it or not this required a lot of
thought on my part. My blogger helper and Dear Lillie marked off 1 inch
increments, which totally makes sense since we are making a growth chart. I,
however, seemed extremely bothered by the fact that there are 16 “tick” marks
on a real ruler instead of 12. So I tossed and turned in bed until I finally
fell asleep, at peace with my decision to deviate from the traditional growth
chart, not ruler.
Like the other two sites, and because my kiddos will
probably be pretty tall, I decided to start my ruler growth chart at 6” so it
would be a 6 ½ ft ruler instead if 6 ft.
I wanted to and should have bought a black paint marker, but
since I had already splurged and bought the wood boards new I decided to use
the (white) paint marker I already had. My plan was to paint everything in
white and go over it in Sharpie. Well as I started that process I quickly
realized that if I wanted to do this right, I needed to go buy a black paint
marker, so I did. My new black, fine-tip paint marker worked wonders and turned
out to save a ton of time.
So now it was time to use those “mirror image” print outs.
This is so unbelievably cool that my project list just doubled because I want
to do this AGAIN and AGAIN! All I had to was go into my “advanced” printer
properties and turn “on” the mirror image option. My printer was bought for
less than $50 in 2007; it is nothing special so I was pleasantly surprised to
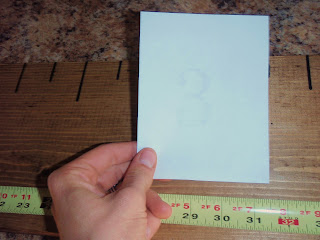
learn about this feature. Anyway, you simply just need to place your mirror
image face down and scribble hard on the back of the paper, over the number,
until the number transfers to the wood. I AM STILL BLOWN AWAY BY THIS.

Then I outlined the number with a ballpoint pen. If you clicked on the other gal’s blog you can tell that I’m now playing along. This was her idea and a good one as the pen creates an indented border that is helpful when you get your paint marker out. After you outline the numbers it is now time to fill the numbers in with your paint marker. Between an iron-deficiency and a caffeine dependency I DO NOT have a steady hand. Thankfully this part only required a little extra concentration and my numbers turned out pretty good.
Once the paint dried, I flipped the board over, added
picture hanging hardware and hung the board so the top was 6 ½ ft off the
ground. I even got it level! Here’s the finished project- 4 years late.
This would make an awesome baby shower gift.


A few helpful tips:
I did not add a clear, protective coating because I wasn't sure how it would when marking off the kids' heights. Maybe next I'll try one with the coating....
My foot and
half foot markings are 2”
My ¼ foot
markings are 1 ½” long
Any other markings
are 1”
I started my
numbers to the left of the foot hash marks and 1 ½” down the hash
When
scribbling on the back of the paper, try to just go over the number. I got lazy
and scribbled a big square area. The number still transferred but you can kind
of faintly see the other indentations in the wood too.
 |
| This is where you can sort of see the indentations outside of the 3. If you want your ruler to be "perfect" I would just color the lines of the number |
This is what
Laura did while I worked- she loved it- she was free and no one bothered her in
there.J


Love the growth chart! When your kiddos make you a Nana one day you will have a nice heirloom to give to one of them! Or you could keep it at your house for to mark your grandkids growth!!!
ReplyDelete